What’s 44Net?
44Net is simply a collection of IP version 4 addresses on the public internet. The 44.0.0.0/9 and 44.128.0.0/10 networks are put aside strictly for amateur radio use and are managed by the ARDC, or Amateur Radio Digital Communications for the exclusive use of hams worldwide. The ARDC sold a block of this address space back in 2019 to fund grants for amateur radio projects, including a major shack upgrade at Michigan State University and for infrastructure on the Central Michigan Emergency Network, among others.
I already have internet at my house. What does 44Net allow that’s different?
Address space in the version 4 specification of IP has long been used up. With each average household using a dozen or more addresses for phones, TVs, laptops, smart lightbulbs and much more, we’ve had to resort to two things: IP version 6 uses a much larger address space, but the addresses are very long and not every device supports it. For those that needed to stick to version 4, we’ve been using NAT, or Network Address Translation, to use a single IP address across every device in a home.
44Net has a wide range of usable IP space that’s only available to ham radio operators and networks. By keeping corporations out of that address space, each ham can have an individual address for each of their ham-related devices. Why is that important?
When we have a REAL public IP address, we don’t have to perform all these “hacks” to get multiple computers to use the same space. That means you can run multiple of the same service on your network without having to screw around with port forwarding and convoluted firewall settings. For example, Echolink only allows one connection per IP address. In your home, that currently means that only one person with one device can be on Echolink at a time. With 44Net addresses for each device, that restriction is lifted. This also means you could have multiple AllStarLink nodes, multiple packet nodes, ham radio related websites, and whatever other internet-ham related things you can think of, all on your own home network.
This ALSO, however, means that each individual computer using a 44.x.x.x address is also exposed to the negative aspects of the public internet, like folks attempting to take control of your computer for nefarious purposes. That means you need to have enough knowledge to properly protect yourself, somewhat unlike the cable or fiber connection to your regular internet provider where they take care of much of that for you.
In short: 44Net is a free and unencumbered IPv4 internet experience that’s great for hosting services to the rest of the amateur radio community.
So what’s 44Net-Connect?
In the past, each individual ham operator who wanted to use 44.x.x.x network addresses had to jump through a lot of hoops (BGP, IPIP Mesh, etc) in order to connect and advertise their address space to the rest of the public internet. This meant that the technical knowledge required to pull it off was often overwhelming.
44Net Connect is a new (as of 2026) way to connect with the greater 44 network address space that just involves using a Wireguard VPN, a very common type of connection often used with businesses, advanced homelab users, and privacy-focused VPN providers. If all you want to do is acquire a 44.x.x.x address to use for a single computer, there’s nothing you need to do except to request and set up this type of connection. You’ll get a single 44Net address to use as you see fit.
If you want to run a series of these addresses on the same network (a subnet), that’s a little bit more involved. We’ll go over both scenarios.
Let’s grab a 44Net-Connect tunnel (VPN) for a single IP address.
If you only need a single IP address or you want to keep the complexity of this process to a minimum, follow this section. If you want to use a whole subnet allocation of 44.x.x.x addresses, skip to the ADVANCED section after requesting your tunnel.
Head over to https://connect.44net.cloud/ and log in. If you don’t already have an account, create one and follow any instructions for validating your amateur radio callsign.
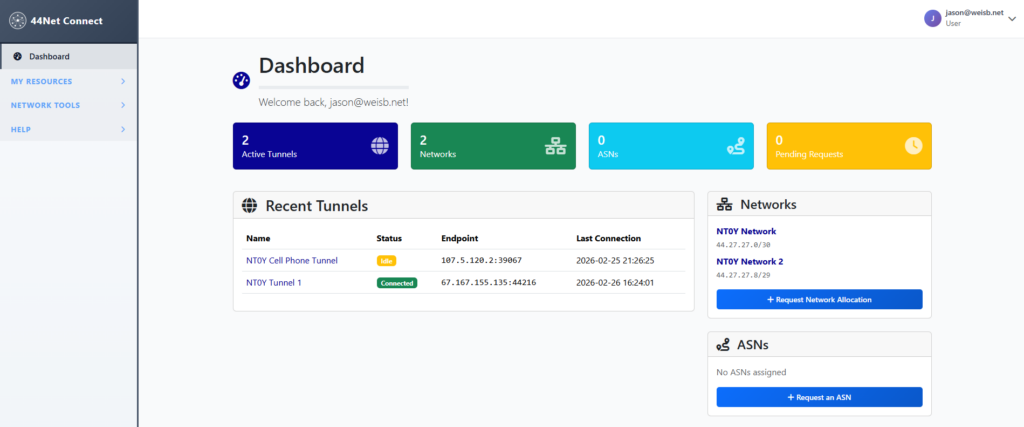
In the Dashboard on the left bar, click MY RESOURCES, then Tunnels.

Request a new tunnel.
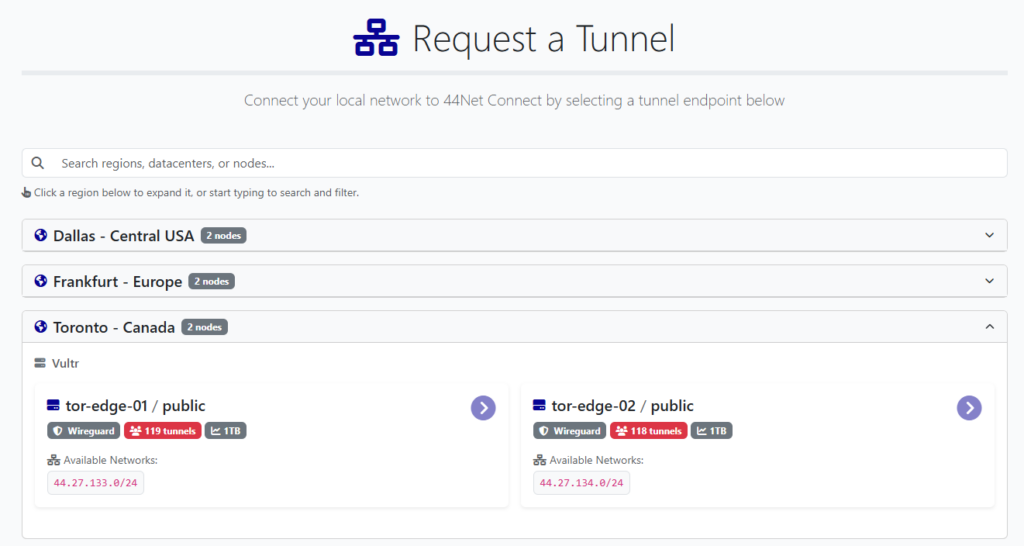
Select the server closest to your location from a network latency standpoint. If you select purely based on physical distance, you may not have the network performance you expect. Also try to choose a server with the least amount of tunnels, since that will be less congested.
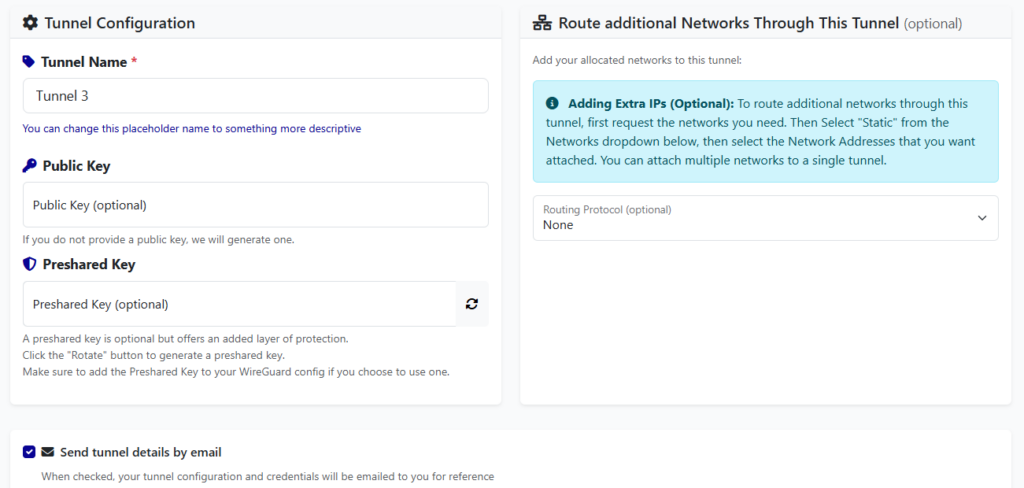
Fill out the tunnel name. Leave the “Public Key” and “Preshared Key” blank unless you have experience with using your own. Don’t worry about “Adding Extra IPs” for now.
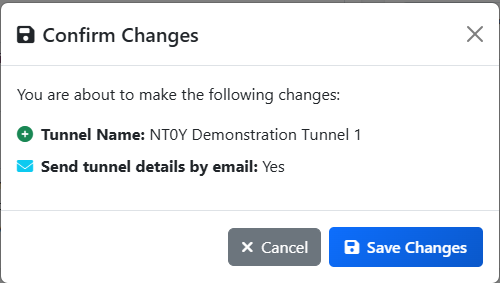
Save Changes.
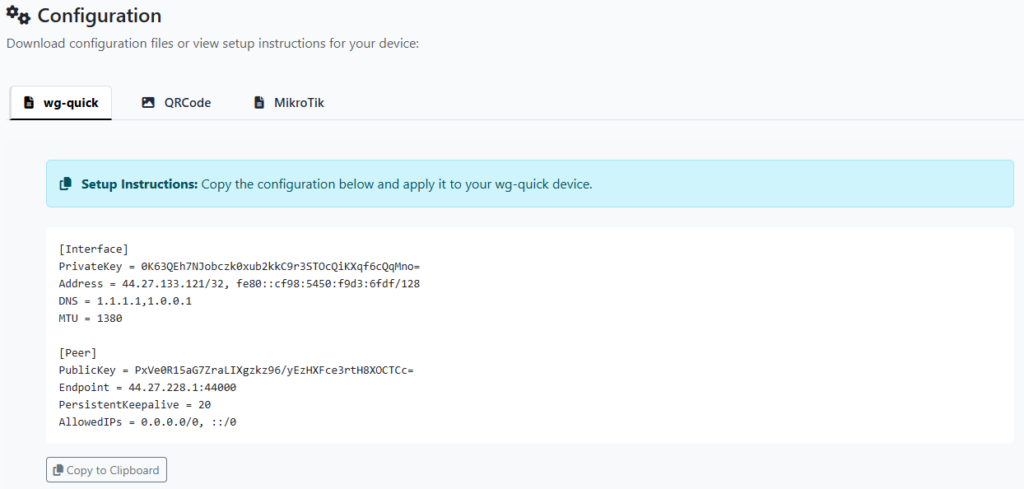
You’re all set to use your new tunnel! Just copy/paste the wg-quick configuration into a text file then import into your Wireguard installation for your particular platform.
If you want to use a whole subnet allocation of 44.x.x.x addresses, skip to the ADVANCED section NOW.
Since we’re going to focus on getting a little more out of this connection, let’s quickly go over how to configure Wireguard on a modern Linux system. In my case, I chose Ubuntu 24.04 Server. The directions for any Linux platform will be similar.
First, make sure your system is up-to-date:
# sudo apt update && sudo apt upgrade -yNow let’s grab Wireguard and a couple other useful tools:
(Ubuntu 24.04 Server)
# sudo apt install net-tools wireguard mtr

(Debian 13 Trixie, thanks to Kyle AA0Z!)
# sudo apt install net-tools wireguard mtr resolvconf
Next, let’s create the Wireguard configuration file that will be used to enable the VPN tunnel and utilize your single 44.x.x.x IP address:
# sudo nano /etc/wireguard/44net-connect.confPaste your configuration from 44Net-Connect into this file. Save and Exit.
Let’s start it!
# sudo wg-quick up 44net-connectCheck to see if the interface is up and running with “ifconfig”:

You should see your new public 44.x.x.x IP in the output like above. Now let’s test it:
# mtr google.com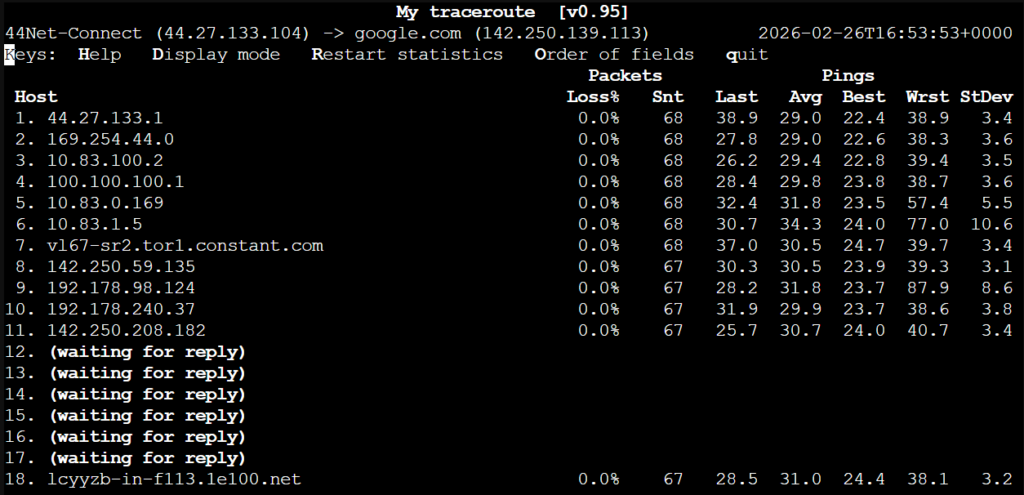
On the top line, note your IP address. Verify it’s on the 44 network. Now let’s make sure this connection automatically reconnects after a power cycle or reboot:
# sudo systemctl enable wg-quick@44net-connect.service
# sudo systemctl daemon-reload
Go ahead and reboot to test. Rerun the “mtr” command to verify. Ping a few websites like portal.ardc.org, google.com, or others to ensure wide connectivity with the greater internet.
That’s it! You’re now connected to the ham-internet and the wider public internet with 44Net Connect!
WARNING!!!!!!!!!
You are now connected to the PUBLIC internet with absolutely no safety net in place. Things that used to protect you are no longer doing so, like your internet company firewall, or NAT (network address translation). You absolutely MUST build your own firewall on each public machine using this above 44Net Connect method!
Doing this is beyond the scope of this document, however, on some platforms it can be rather simple, like enabling Windows Defender Firewall on any Windows 10 or 11 machines, installing a firewall app on your Android phone, or enabling the firewall on your MacOS system. On Linux, you’d better just know what you’re doing.
Very briefly, on Linux:
# sudo apt install ufwthen enable the firewall:
# sudo ufw enableThis will by default allow any outgoing connection and BLOCK any incoming connections. You will need to do some reading about how to enable incoming connections for certain services. For example, to allow incoming AllStarLink connections to your node:
# sudo ufw allow 4569/udpOr to allow SSH connections:
# sudo ufw allow sshAfter each change, you must reload “ufw” for it to take effect:
# sudo ufw reloadThere are a million different ways to do the same thing with “ufw”, so take the time to read from the following resources:
https://blog.rtsp.us/ufw-uncomplicated-firewall-cheat-sheet-a9fe61933330
https://ni2o.ampr.org/documents/UFW%20rules%20for%20AMPR%20VPN%20.pdf
https://manpages.ubuntu.com/manpages/focal/man8/ufw.8.html
References
https://ni2o.ampr.org/documents/LXC%20container%20as%20a%2044Net%20VPN%20Subnet%20Router.pdf
https://ni2o.ampr.org/documents/LXC%20container%20as%20a%2044Net%20VPN%20Router_Firewall.pdf
https://blog.rtsp.us/ufw-uncomplicated-firewall-cheat-sheet-a9fe61933330
https://allstarlink.github.io/adv-topics/44net-connect
https://www.reddit.com/r/mikrotik/comments/1f0kpji/networking_in_linux_only_really_slow
https://superuser.com/questions/1771165/change-mtu-size-using-netsh-interface-ipv4-command