You’ve just gotten your new AllStarLink 3 node up and running, either on your high-power simplex repeater, or on a long-range full duplex repeater setup. Awesome! But the thrill is gone once you realize it can only use CW to identify itself. No announcements, no voices, no time…… nothing. Let’s go over a few ways to spice up the ID and custom announcements so your users can have more information. It will attract attention.
Create A Custom Voice Recording
Requirements
- Audacity 3.77 or later
- Any text-to-speech engine (like ElevenLabs AI-based)
- Google Drive, MobaXTerm, or any place on the web accessible from your node to put files to download
- Completely configured ASL3 Node
Generate the Audio File
Using an AI text-to-speech model is beyond the scope of this article. ElevenLabs is wonderful, and mostly free except for edge use cases and high volume. More traditional text-to-speech engines will also get you there. You could also record your group or club’s live audio, which is a great way to provide extra personalization. Either way, you should have some kind of standard audio format like an MP3, AAC, or FLAC file.
Let’s convert this into the correct format for AllStar:
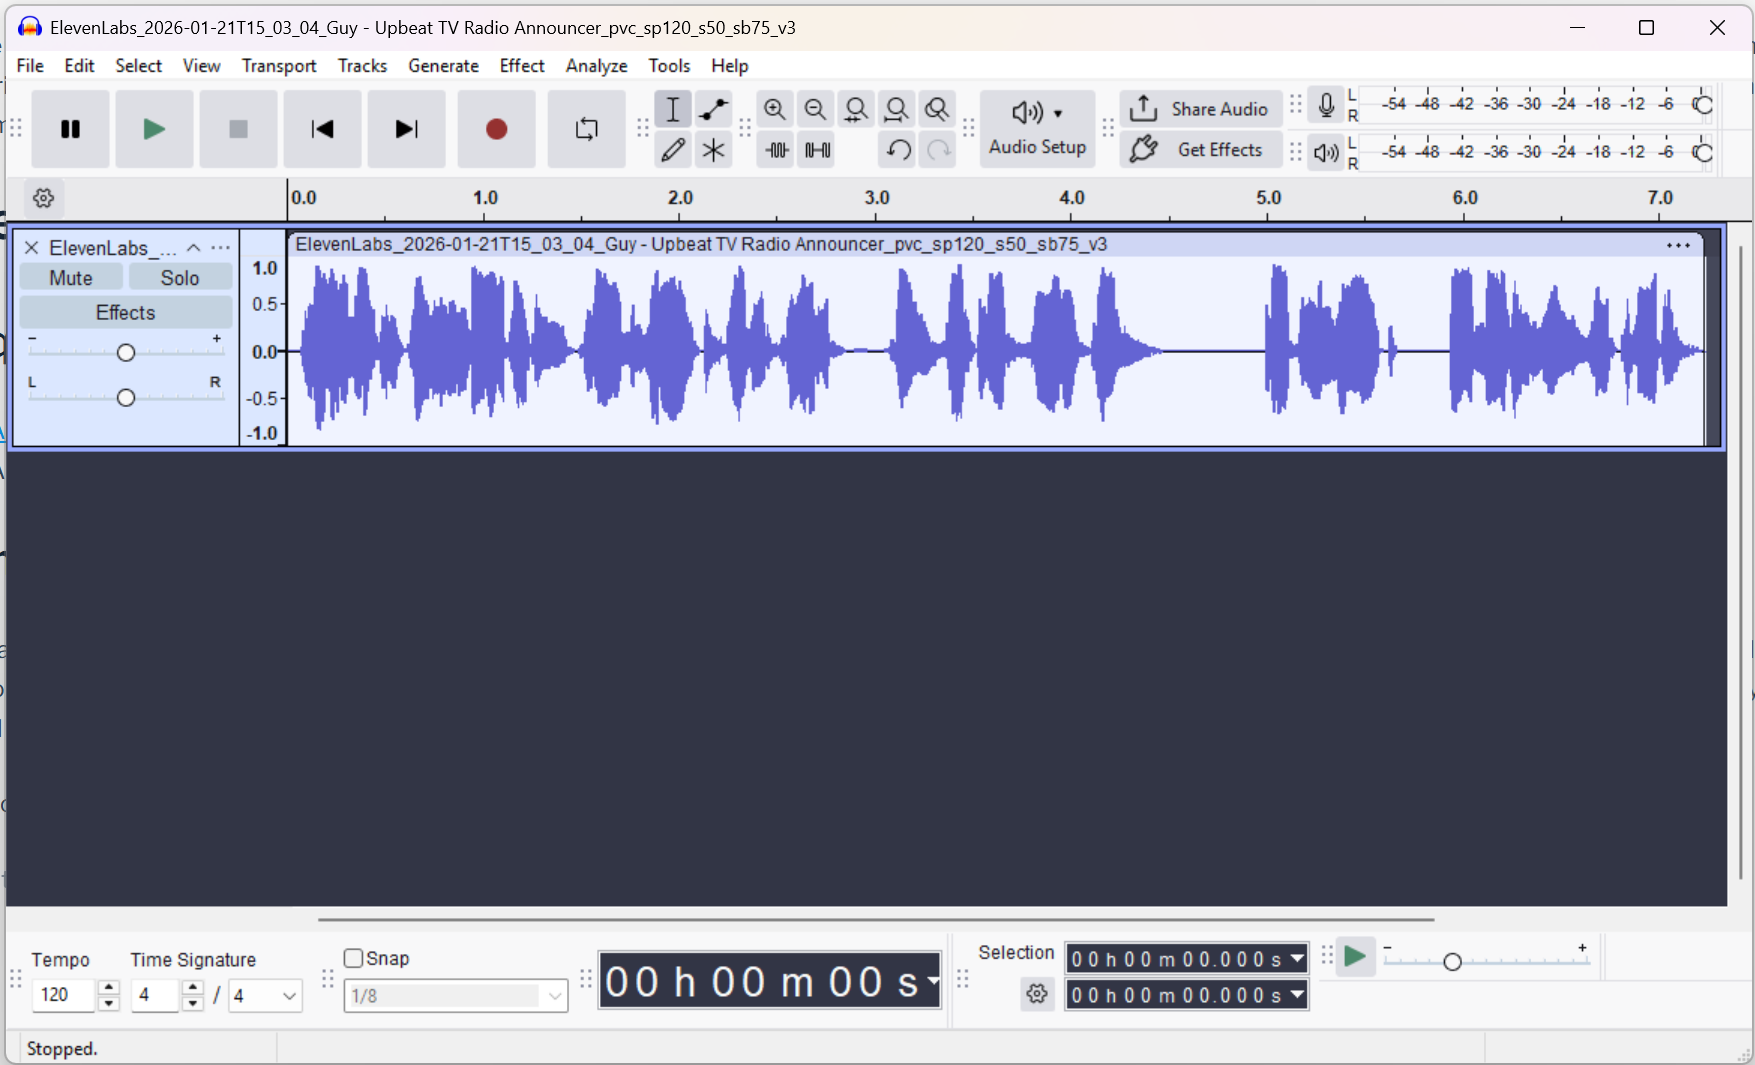
First, select the whole recording by pressing CTRL + A on the keyboard.
Select the “Effect” menu, then “Volume and Compression”. Select “Normalize”:
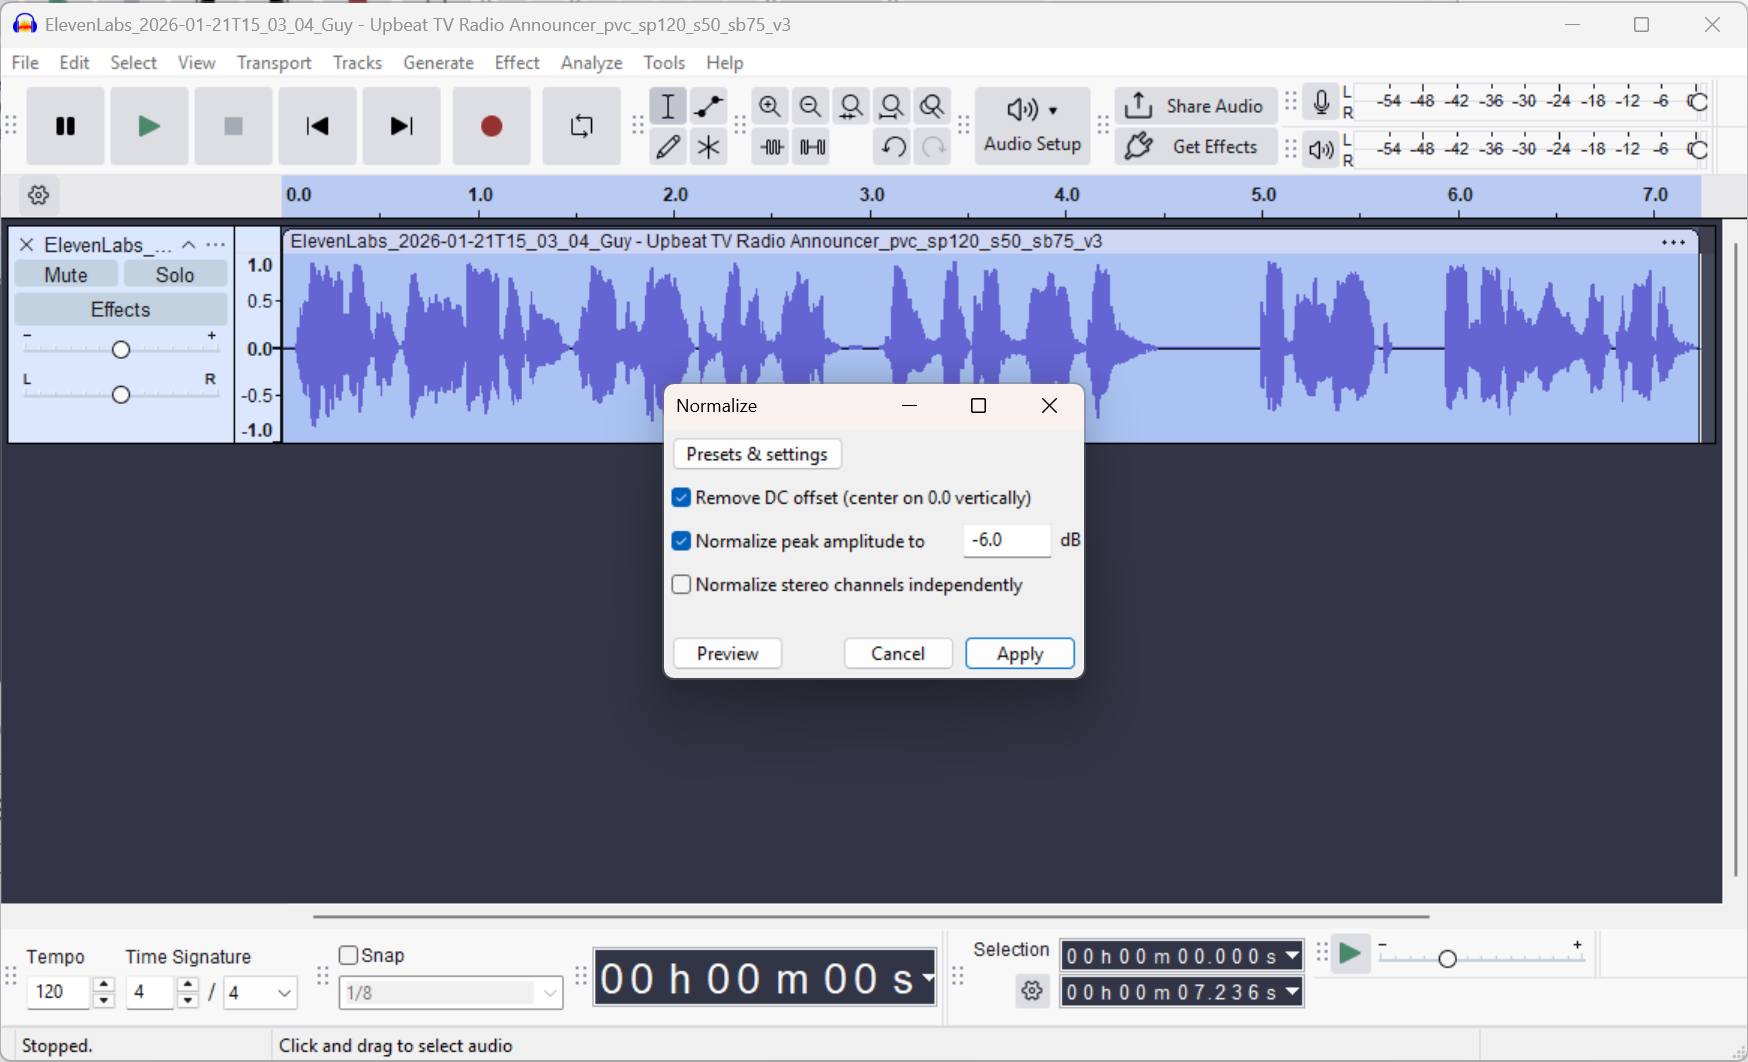
Ensure that “Remove DC offset” and “Normalize peak amplitude to” are checked, and input a value of “-6.0” dB. Apply.
Hit “File”, then “Export Audio…”:
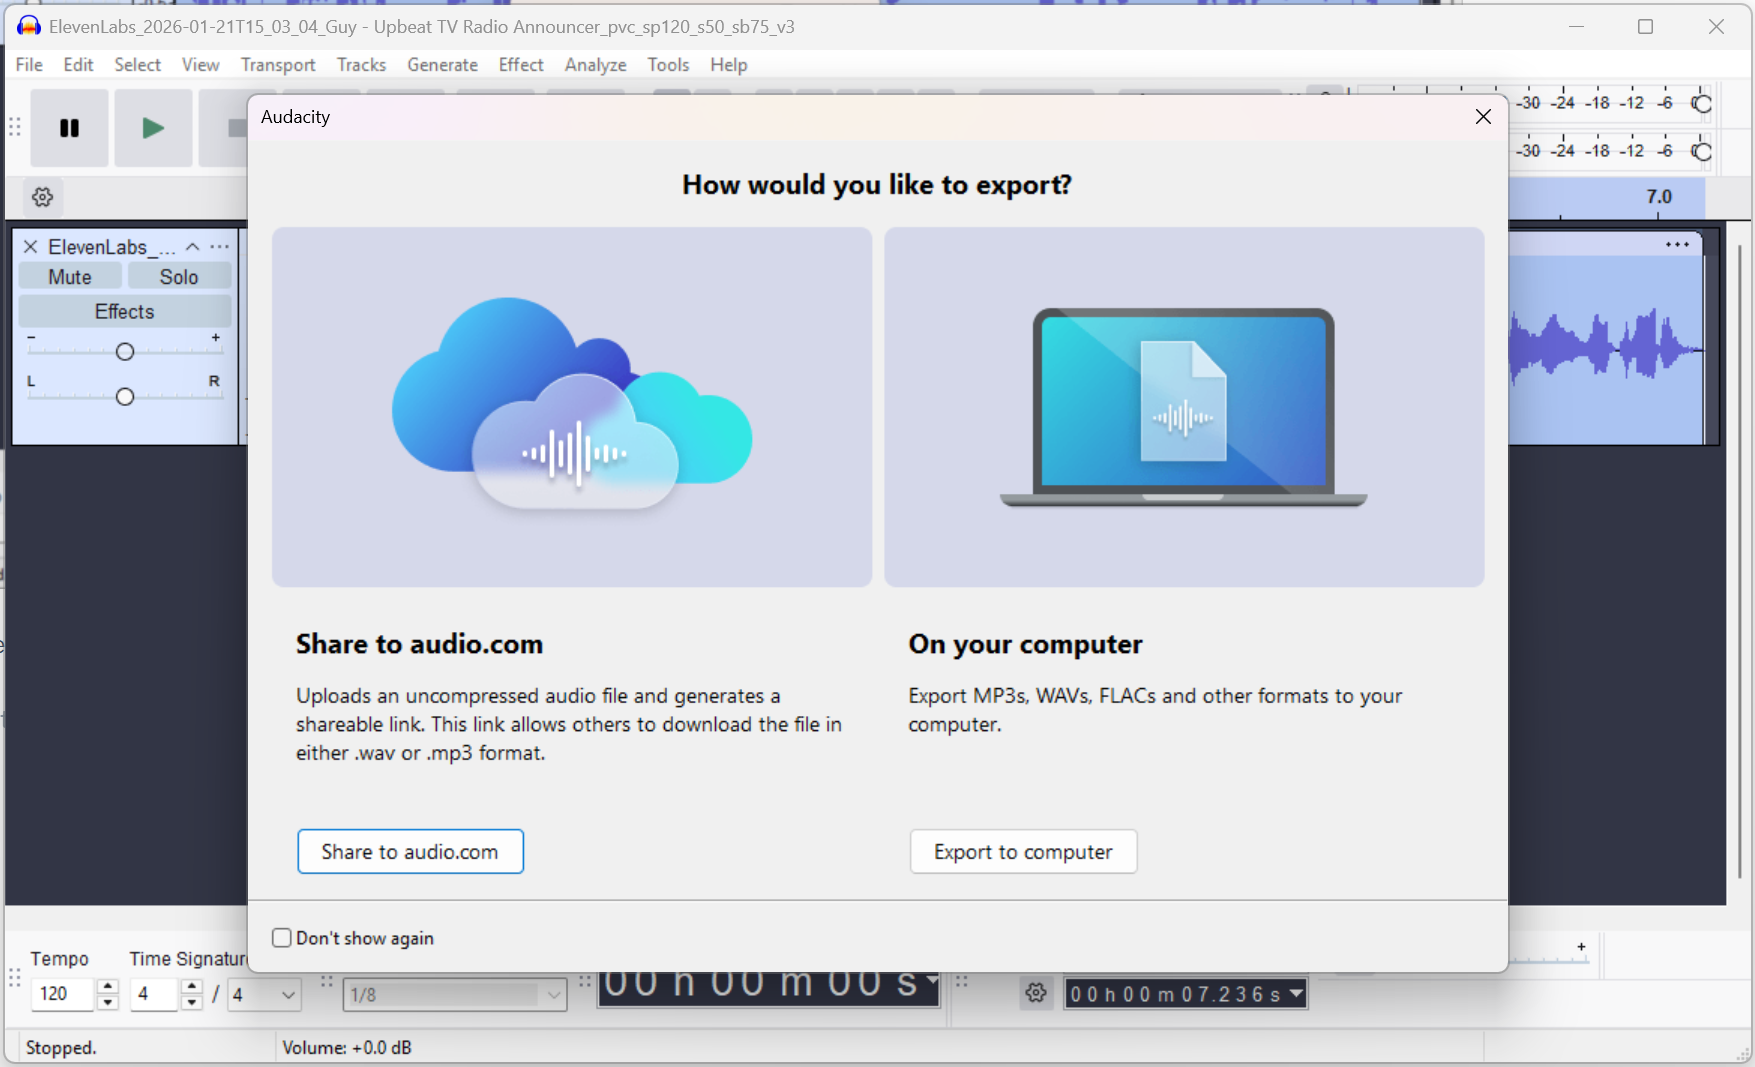
Export to computer is the correct option here.
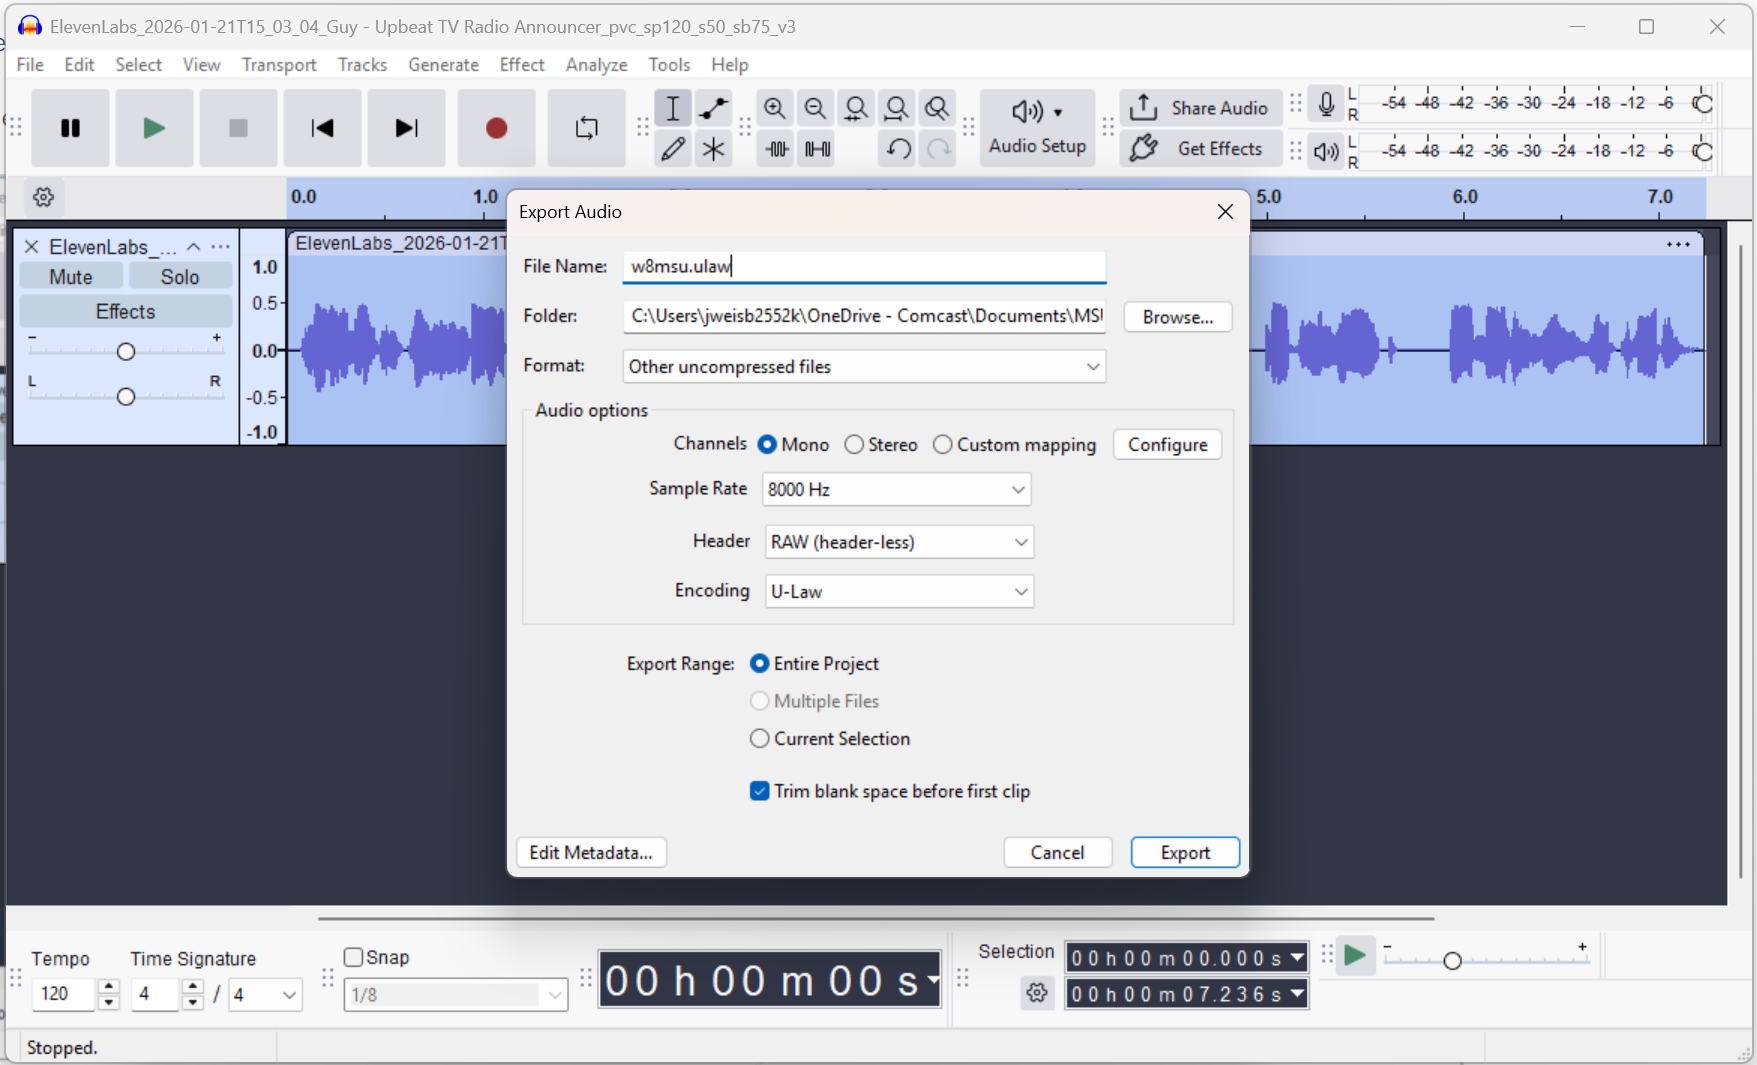
The options here need to be very specific.
Edit the File Name to be something short, simple, and change the suffix to be “.ulaw”.
Select “Other uncompressed files” under Format.
Channels “Mono”, Sample Rate “8000 Hz”, Header “RAW (header-less)”, Encoding “U-Law”.
Be sure to export the Entire Project, and check “Trim blank space before first clip”.
Hit “Export”.
How To Upload To AllStarLink Server
Here’s the tricky part. Most AllStar nodes are just a command line. How do we get this file onto the server?
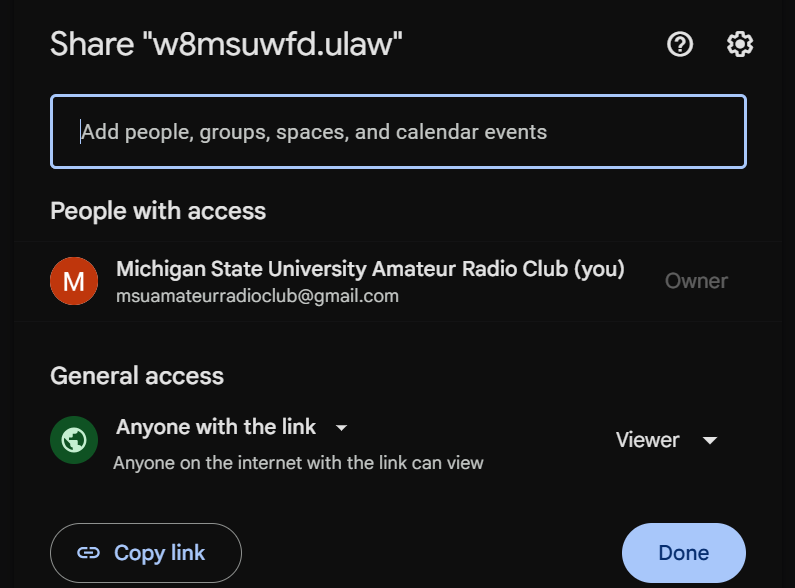
Let’s utilize Google Drive. Right-click the uploaded file, select “Share”, then “Share” again.
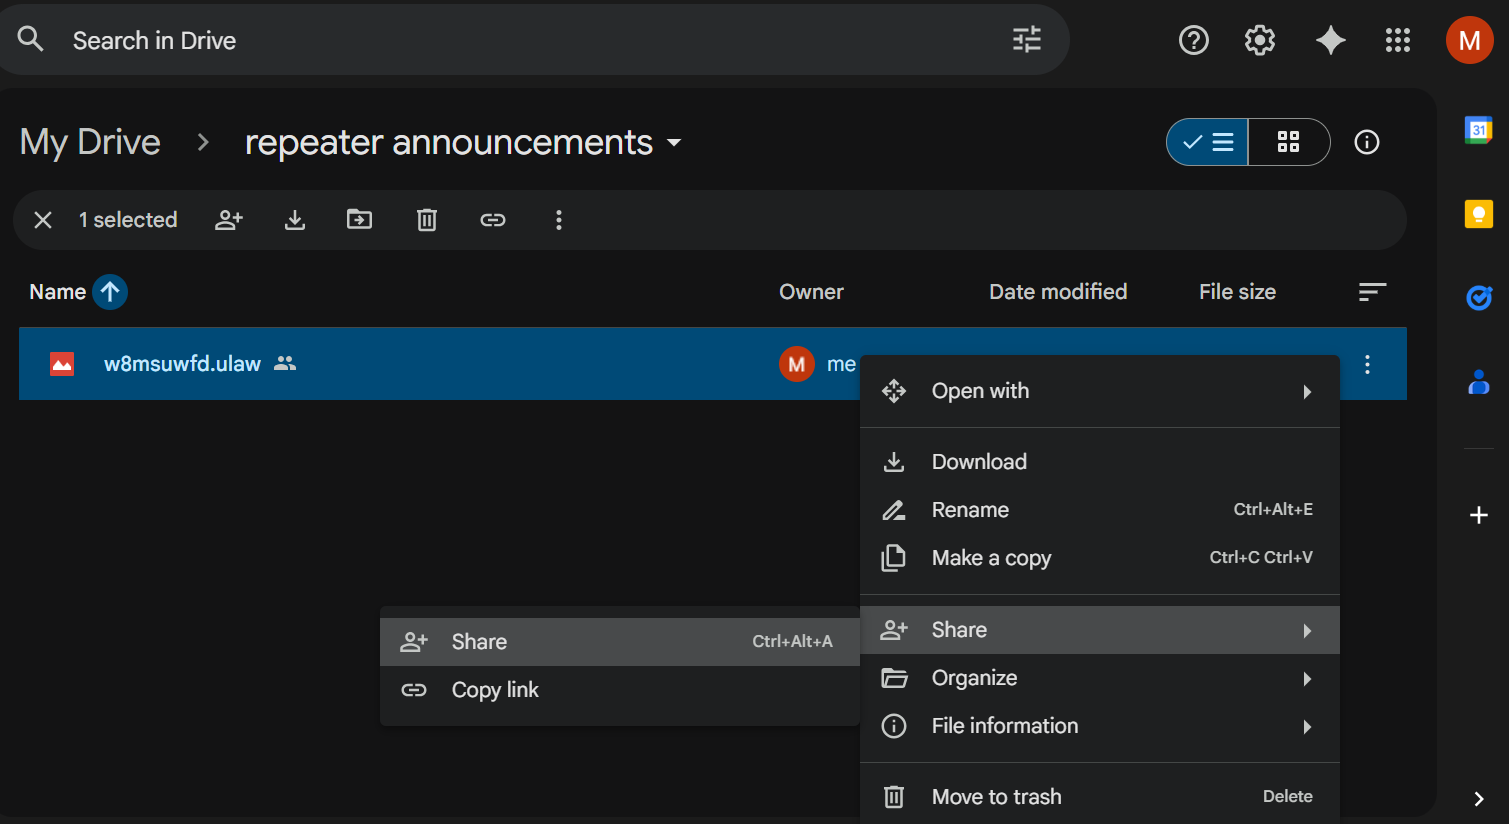
Change the General Access to “Anyone with the link”. Copy the link.
Paste the link into Notepad or Notepad++ or the like. You’ll notice a format like the following:
https://drive.google.com/file/d/**THIS IS THE FILE ID**/view?usp=sharingThe section above that says **THIS IS THE FILE ID** will be a bunch of random characters and numbers. Let’s take this into the ASL node command line and download the file. First, let’s make sure you have a directory to store the new audio:
# sudo mkdir /var/lib/asterisk/sounds/myid
# cd /var/lib/asterisk/sounds/myid
And now let’s download from Google Drive:
# sudo wget https://drive.google.com/uc?id=**THIS IS THE FILE ID**This will download a completely garbled filename. Let’s take a look by issuing an “ls” command:

Change the name back to what it should be:
# sudo mv 'uc?id=WHATEVER THE REST OF IT IS' announcement.ulawAnd change the permissions so that ASL can see and use it:
# sudo chown asterisk:asterisk announcement.ulawAwesome. Now the file is safe and sound on the node. Let’s use it.
Alternative: Using MobaXTerm To Upload Audio Files
Courtesy of Levi N8GMZ, you can also use MobaXTerm to connect with your ASL installation to both run commands and upload/download files! This requires some working knowledge of properly configuring SSH and connecting with a client, but with that out of the way it should be smooth:
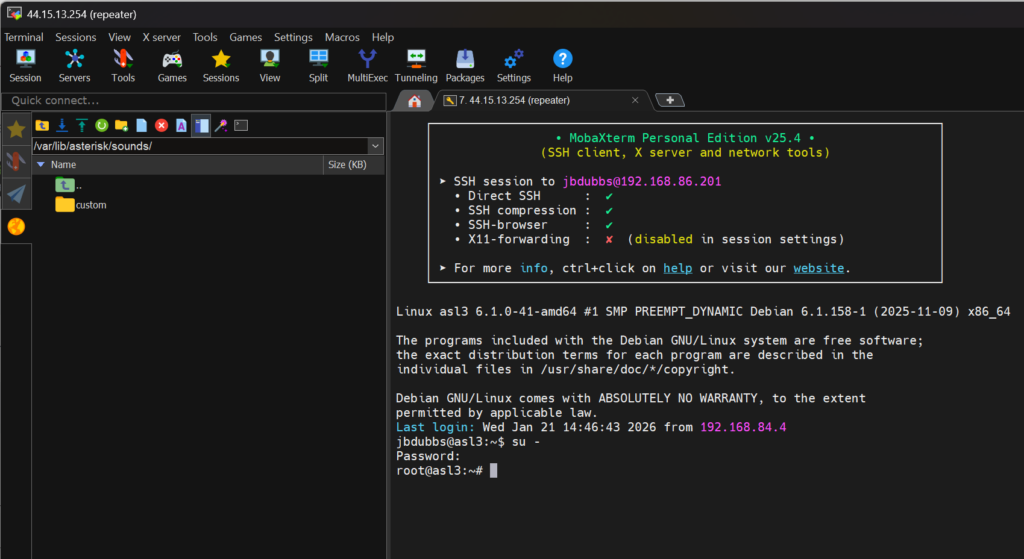
See the MobaXTerm website for downloads and additional details.
Enable Your New Voice ID
Assuming your node is already otherwise configured, there should be a definition for your node in rpt.conf:
# sudo asl-menuGo to the Expert Configuration Menu, then Edit rpt.conf file…
In the new style rpt.conf for ASL3, your node definition should be all the way at the bottom. Add the following line:
idrecording = /var/lib/asterisk/sounds/myid/**YOUR FILE HERE WITHOUT SUFFIX** ; Winter Field Day ID“idrecording” specifies a voice recording to identify with.
“**YOUR FILE HERE WITHOUT SUFFIX**” needs to be replaced with your file name. OMIT THE SUFFIX. If your file was named “w8msu.ulaw”, you should only enter “w8msu”.
The semi-colon specifies a comment. Anything after this point in the line is ignored by ASL and only serves to jog your memory of what the line does.
Save the file with “CTRL + O” and exit with “CTRL + X”.
Reboot the node to hear your results!
Periodic Time-Based Announcements
Your announcement might be better suited to be based on a schedule, like a field day announcement, or the next club meeting. If your announcement doesn’t identify the repeater, it’s probably better off being time-based. We’ll use define the playback function, make it a macro, then schedule it.
First, let’s define playing the audio file as a new function. In rpt.conf, you’ll see the following:
[functions-main](!)
;;;;;;;;;;;;;;;;;;; functions stanza ;;;;;;;;;;;;;;;;;;;
; Prefix    Functions
; *1        Disconnect Link
; *2        Monitor Link
; *3        Connect Link
; *4        Command Mode
; *5        Macros
; *6        User Functions
; *7        Connection Status/Functions
; *8        User Functions
; *9        User Functions
; *0        User Functions
; *A        User Functions
; *B        User Functions
; *C        User Functions
; *D        User Functions
We’ll plop our new function right under there. Notice it defines 8 – D as user functions. Let’s define a new function under 0:
01 = playback,/var/lib/asterisk/sounds/myid/**YOUR FILE HERE** ; Comment here about what this does“01” is the number of the function. This means you can call it from DTMF tones, or you can use it in macros.
“playback” specifies that the file will play over all channels for which telemetry is enabled. This can also be “localplay” to only play on the direct wired connection to the repeater.
**YOUR FILE HERE** is your audio file you’d like played. No file extension, earlier in the how to.
Further down, let’s find the [macro] section:
;;;;;  Macro commands ;;;;;
;1 = *712
;2 = *822000
;3 = *832000
;4 = *31998*32000
Remove the semi-colon from macro 1 and edit to read like:
1 = *01 ; Comment here about what this does (play an audio file)Now let’s schedule it under the [schedule] section. You’ll see this:
;;;;; Scheduler - execute a macro at a given time ;;;;;
;dtmf_function =  m h dom mon dow   ; ala cron, star is implied
;2 = 00 00 * * *                    ; at midnight, execute macro 2.
1 = 30 * * * *                      ; comment here about what this does (play audio file once an hour at the 30 min mark)
Here, I edited the scheduler to execute macro 1, and I formatted it to play the announcement every hour. The schedule only appears to be in “cron” format, for us Linux geeks. It’s similar, but it’s own format which is notated as follows:
(MM) (HH) (DayOfMonth) (MonthOfYear) (DayOfWeek)
And each field is a little different too:
- There must be 5 time/day entries,
*included - The five time fields must each be separated by a single space
- (m) Minutes after the hour are
0-59 - (h) Hours since midnight are
0-23 - (dom) Day of month are
1-31 - (mon) Month of year is
1-12 - (dow) Day of week (days since Sunday) is
0-6(Sunday starts as0, ending with Saturday as6) - Any item that is all inclusive or “doesn’t matter/every” can be set with a star
*as a wildcard
For example, if I want a macro to play at 17:45 on a tuesday, I would put:
1 = 45 17 * * 2which reads: Execute macro number 1 at 17:45, every Tuesday. Don’t set a day of the month, or a particular month.
IMPORTANT: It seems like you should be able to skip right to defining the audio file in the macro itself. You cannot, I tried. It must be first defined as a function, then as a macro, then scheduled, or it doesn’t work at all.
Save rpt.conf and restart Asterisk.
Test Your Macro
To be sure your audio file plays when you asked it to, let’s run a test. Edit rpt.conf to the following:
Change your desired time on the schedule to 10 minutes from your current time. In my case I’m changing the schedule from:
1 = 30 * * * * ; comment here about what this does (play audio file once an hour at the 30 min mark)to this:
1 = 25 09 22 01 * ; test today only at 9:25Save and restart Asterisk.
When the repeater comes back up, send DTMF tones from your radio to trigger the macro. All commands begin with a *, and all macros begin with a “5”. So to trigger our macro #1, we send “*51”. If we set it up correctly, your audio should play immediately. This means both the function and the macro are working. If it doesn’t work, you can test just the function by sending “*01” and troubleshoot your way back from there.
Last, we can wait for our schedule to trigger. If you hear it, you’re all set! Remember to set your schedule back!
Alternative: Tail Messages
Tail messages are audio files that are periodically played at the end of a user transmission. Unlike using the scheduler, these are only played with users activating the repeater or node, so they’re sure to hear them and they shouldn’t interrupt any active transmissions.
To define tail messages, add the following line to your node definition at the bottom of rpt.conf:
tailmessagelist = /var/lib/asterisk/sounds/myid/audiofile1,/var/lib/asterisk/sounds/myid/audiofile2This indicates to enable tail messages, and to rotate them in the order you just specified. Add the following line to control how often they play:
tailmessagetime = 900000 ; 15 minutes between tail messages (time in ms)And add this line to define how soon to try playing the message again if a user keys up over it and “squashes” it:
tailsquashedtime = 300000 ; 5 minutes (time in ms)References
https://wiki.allstarlink.org/images/d/dd/RecordingSoundFiles.pdf
https://wiki.allstarlink.org/wiki/Rpt.conf
https://community.allstarlink.org/t/how-do-i-play-a-sound-file-in-asl-3/22424/5
https://mobaxterm.mobatek.net/download-home-edition.html
https://allstarlink.github.io/adv-topics/scheduler/#setting-up-the-system-scheduler
https://allstarlink.github.io/adv-topics/tailmessage/#tailmessagetime